How to Use Dog Nail Clippers
Overview
- Most dogs don’t like having their paws handled, so at-home nail trims are stressful.
- It's important to get dogs used to nail clippers and create positive associations with them.
- When starting to use dog nail clippers, go slow. Cut one nail, reward your dog, and call it a day.
- Work your way up to trimming more nails as your dog gets comfortable.
- Be cautious when clipping and avoid cutting the quick, which can cause bleeding.
Pet parents consider nail care a dreaded basic grooming task. Most dogs don’t like having their paws handled to begin with, so adding weird body contortions and a piece of equipment that has the potential to hurt can turn what should be a straightforward process into a nightmare.
“Some dogs fear restraint and some have had bad experiences and experienced pain during a nail trim,” says professional dog trainer Lori Nanan. “These things can make nail care stressful and difficult.”
Keeping your dog’s nails at the right length is about more than just aesthetics or floor preservation—doing so prevents pain and even injury. Nails that are too long can lead to uneven weight distribution, splayed feet, mobility issues, and in extreme cases, the nail might even grow into the paw pad.
Dogs that spend more time outside might wear down their nails naturally, but most dogs require regular nail clipping to keep them at a comfortable length.
While a major part of successful nail trims is the training that occurs before you even make your first snip, choosing the best equipment for the job can help to alleviate some of the stress for both parties. Pet parent groomers who are comfortable with the trimming tool will feel more confident with the task, and that sense of calm will translate to your dog.
Dog Nail Clippers: Understanding the Basics

Picking the right dog nail clippers can feel overwhelming since you’re choosing for two parties. You want a tool that’s comfortable and easy to use, but you also need to consider your dog’s size and nail type.
“Don’t skimp on quality,” Nanan suggests. “Look at products groomers use to get a sense of what’s considered best.”
Keep in mind that dog nail trimming equipment can dull over time, so if you’re investing in a pricier product, make sure that you’ll be able to keep the blade sharp. A dull clipper can lead to extra pressure on the nail, which will make trimming even more uncomfortable. Plus, it could leave a jagged nail edge.
So how can you tell when your dog needs a nail trim? If you can hear your dog heading your way, they’re probably too long. Nanan says that trimming nails until they’re “just off the floor” keeps your dog’s paws comfortable but still allows for traction.
The Difference Between Dog and Cat Nail Clippers
The difference between dog and cat nail clippers might come down to marketing.
“Most can be used interchangeably between dogs and cats,” says Caitlin Kucsan, professional groomer and owner of Pugs & Kisses Pet Care. “However the scissor style (see below) seems to work best on cat nails as they are typically much less hard to cut than a dog’s.”
Opt for a smaller size when picking cat nail clippers to prevent over-clipping.
Types of Dog Nail Clippers
Dog nail trimming tools come in a variety of styles—and all have different functionality and uses.
Nanan suggests that if your dog has had a negative experience with one type of clipper, switch to a different tool. “You can build a new positive association more easily than undoing a negative one,” she adds.
Below are some of the common types of dog nail clippers you’ll find in most pet stores:
Scissor/Plier Style

This nail trimming standby functions like regular scissors, with a blade at one end, usually notched, and handles at the other. Plier-style trimmers have a spring near the blade for added strength. This style can be used on dogs of all sizes and are particularly good for larger breeds.
Guillotine Style

These clippers have a small opening for the dog’s nail and the blade cuts through when the handles are squeezed. Guillotine nail clippers can be used on dogs of all sizes but it can be challenging trying to thread bigger dog nails into the opening.
Grinder Style

This rotary tool doesn’t actually clip your dog’s nails but uses a sandpaper-like barrel to grind down your dog’s nail. Grinders can be used on dogs of all sizes, but they might require a longer introductory phase because of the noise the tool makes and vibrations on the paw.
How To Use Dog Nail Clippers
Learning how to use dog nail clippers takes some time, patience, and practice. It also requires that pet owners work with their dogs ahead of time to get pets comfortable with the clippers.
The Introductory Phase: Step by Step

The best advice when learning to use dog nail clippers is to let your dog set the pace. Before you try to cut your dog’s nails, give him a chance to get to know the equipment. The goal is for your dog to associate nail clippers with something positive and pairing the tool with lots of high value treats is a great way to make that connection.
Step 1: To begin, show your dog the clipper. Let him sniff it and then immediately give him a meaty treat or a small piece of cheese.
Step 2: Gently move the clipper towards his foot then give him a treat. Continue this process, gently touching the clipper to your dog’s front and back paws and then rewarding him with a treat. Repeat this for a few successive sessions. Be upbeat and positive during the beginning stages—you want your dog to think the tool is something wonderful.
Step 3: Get your dog used to being held. Keep in mind that it’s not just the nail cutting that many dogs object to. For some, being restrained is enough to make them start flailing. You will need to keep your dog’s paw steady as you cut, so it’s important to acclimate him to that sensation as well.
Begin by briefly picking up your dog’s paw for a moment, touch the clipper to it and then give him a treat. Over the course of several sessions work up to holding your dog’s paw in a way that resembles how you’ll grasp it when you actually cut it—with the nail isolated and extended.
Hold your dog’s paw in this position briefly, touch the clipper to it then release him before he starts to struggle and follow up with a treat.
Step 4: Once your dog is comfortable with this sort of foot handling (don’t forget to do it on the back feet too), start touching the clippers to his foot in a way that mimics what you’ll do when you cut. Exert gentle pressure on both the paw and the clipper handles, without cutting. Always follow up with a treat.
The Nail Trimming Phase: Step by Step

Once your dog starts showing a positive reaction when the clippers come out, you’re ready to try an actual cut. But keep in mind that you won’t be trimming all of your dog’s nails during the first session. Take things slow and go at your dog’s pace.
It helps to put smaller dogs up on a table so you don’t have to contort yourself (or your dog) to handle his paws.
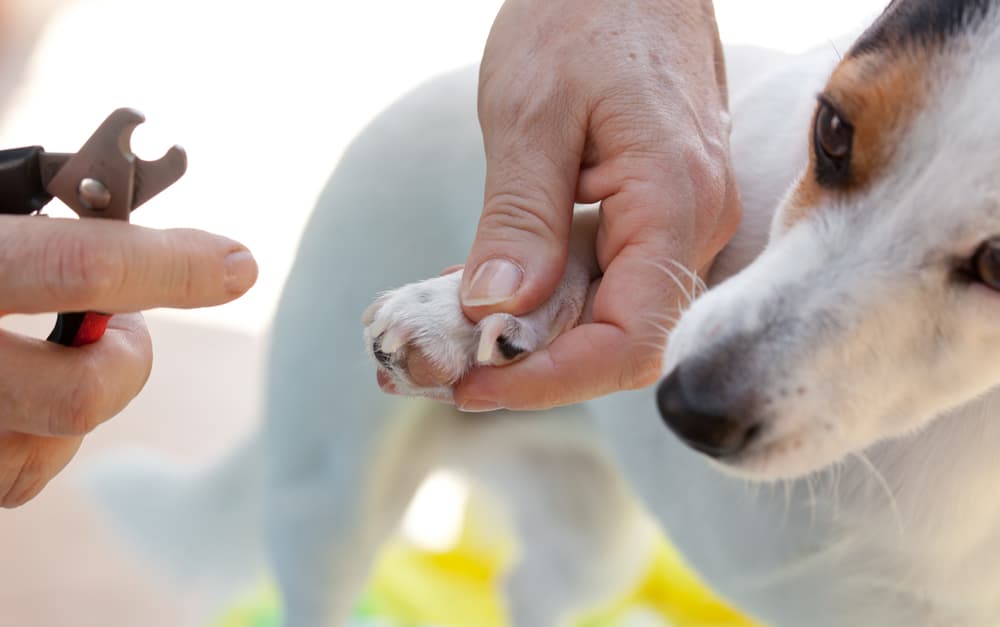
Step 1: Isolate your dog’s nail, making sure to move the fur out of the way. For dogs with light nails, identify the quick, which is the nerve and blood vessels in the dog’s nail. The quick isn’t visible in dogs with black nails, so use caution when cutting and only clip a small amount of nail each time. Accidentally cutting the quick is painful and it will cause a dog to bleed, so be careful to avoid cutting too deep.
Step 2: Cut just the tip of the nail straight across. Then release your dog’s paw and give him a treat. If the nail is still too long, make another small cut, then give another treat and then stop for the day.
Step 3: Continue clipping nails in ongoing sessions until you’ve trimmed all of them. Eventually you’ll be able to get through all sixteen to twenty nails in a single session, but it’s best to go slowly during the acclimation process.
Pro tip: Don’t forget to trim the dew claw, which can be hidden in fur. This thumb-like nail is usually found on the front legs, but may also be present on the back legs in some dogs. It doesn’t touch the ground and grows unchecked, so it’s likely to be longer and thicker than the rest.
Safety Tips for Trimming a Dog’s Nails
Taking your time during the acclimation process and making nail trims a positive experience can turn this chore into a day at the spa. The following safety tips will help set you and your dog up for success:
Begin training early. Start introducing a new puppy to “touch for a treat” paw handling right away and make it a very positive experience.
Trim your dog’s nails frequently. The longer you wait to cut your dog’s nails, the longer the quick grows inside the nail and the more likely it is that you’ll nick it.
Be careful of fur when using a grinder. Nanan suggests putting your dog’s paw in a stocking or sock to keep the hair clear of the spinning drum.
Don’t forget the styptic powder. Accidents happen, and if you nick your dog’s quick it’s going to get messy. Styptic powder is an antiseptic clotting agent that stops bleeding quickly.
Listen to your dog. If your dog is fighting you during the nail trimming process it’s likely you pushed too hard. Nanan reminds pet parents to recognize that if nail care is a struggle, it’s not because your dog feels like giving you a hard time about it, it’s because he’s having a hard time with it. However, if you pick the right tool for the job, introduce it slowly and trim with care, you and your pup will “nail it” in no time!


